Storyboarding: A How-To Guide For Prospective Filmmakers
Do you remember making outlines before writing essays in school? That initial step allowed you to gather your thoughts, organize the flow of your project, and ensure you didn’t have any missing details. Creating an outline for a paper is much like creating a storyboard for a film.
Storyboarding is a common and critical part of the pre-production process in filmmaking. A storyboard acts as a map for filmmakers to help them bring their vision off the script and into reality. Learn all about the storyboarding process in this ultimate guide!
What Is a Storyboard?
A storyboard is a visual depiction of a film sequence, either drawn on paper or rendered on a software program. Storyboards consist of drawings that match the action of the script, paired with dialogue, camera direction, and other important details. Its purpose is to break down the action of the sequence panel by panel and sketch out how the action will unfold in each shot.
Oftentimes, a completed storyboard looks similar to a comic book. The action is drawn out in squares that are organized in panels. Storyboards come in all different styles because they are as unique as the filmmakers who create them.
Some storyboards may have elaborate, detailed sketches, and others may employ stick figures. The quality of the content isn’t too much of a concern because the main focus is just to guide filmmakers and help them visualize what scenes will look like on camera.
Do You Need to Use a Storyboard for Every Scene?
How often a storyboard gets used completely depends on the director. Some directors choose to use storyboards only for complicated action scenes, and others like to storyboard every single scene. Some may choose not to use storyboards at all!
Storyboarding is a process that should be helpful to filmmakers, not tedious. As you embark on your filmmaking journey, give storyboarding a try. You’ll quickly learn how often you prefer to use storyboards.
Storyboard Formats
Again, storyboarding is a tool to help filmmakers with the pre-production process. There isn’t one exactly-correct way to storyboard since different filmmakers have different styles, visions, and ways of creating.
However, there are typically two standard storyboard formats: traditional and thumbnail.
- Traditional-Style: Traditional storyboards are simple but detailed. They include basic pencil sketches and detailed information about characters, camera movement, props, lighting, and more.
- Thumbnail-Style: Thumbnail storyboards have little to no writing, only sketches. This format isn’t as detailed, and it’s used to give basic visual inspiration to a small crew.
How to Make a Storyboard in 9 Steps
Even though storyboards aren’t a required part of the filmmaking process, most filmmakers would agree that storyboarding is incredibly helpful, especially when it comes to pitching to producers. It also helps get the entire crew on the same page.
Most people avoid storyboarding because they assume it is stressful or time-consuming. We say it definitely does not have to be!
As long as you stay organized, storyboarding won’t be unnecessarily stressful. Follow these 9 simple steps to create your first or your fiftieth storyboard!
1) Spend Time With the Script
Before you can create a storyboard you need to get super familiar with the story. Imagine showing up to a book club and sharing your thoughts on a book you’ve never read. You may be able to share some thoughts if you skimmed the book, but if you read every word and spent time analyzing it, then you’d really be able to contribute to the book club.
The same goes for storyboarding. The more time you spend with the film script really reading, visualizing, and analyzing the words on the page, the better you’ll be able to storyboard.
Consider the details in every scene and not just the obvious ones like the characters and the general location. Think about the specific details like:
- The color of the characters’ hair
- The lighting
- The wardrobe
- Staging and action
- The layout of the exact location
Once you have a solid understanding of the story, go through and mark up your script. Note each prop, set dressing, costume, and piece of action on each page. Fill in any missing details. For example, if the script says that a character dances, start thinking about each specific move in the dance.
2) Determine the Aspect Ratio for Your Film
When you create a storyboard, you want to ensure your thumbnails are of a similar ratio to how your film will be shot. You don’t want to plan for a certain shot size, only to realize that half of your lead actor’s head would be cut off by the aspect ratio when filming.
Think of aspect ratios as the different ways you can crop a photo before posting it on Instagram. Except in film, the aspect ratio is decided before filming, and it remains the same throughout the entire film. The most common aspect ratios are:
- 16:9 — TV and online videos
- 1.85:1 — Film dramas and comedies
- 2.39:1 — Extra widescreen, often used for action films
- 1:1 — Square videos for social media
- 3:2 — 35mm DSLR camera format
- 4:3 — Non-widescreen standard for TV
It’s okay if the images in your storyboard don’t match your aspect ratio exactly, but you’ll want to be as close as possible.
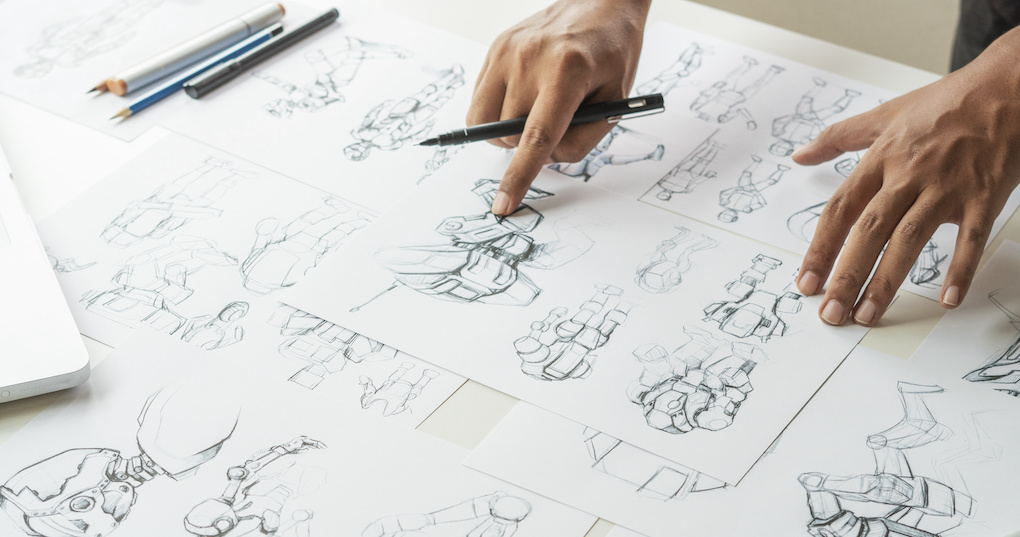
3) Sketch Your Subject
Now we’re moving into the visuals of the storyboard! The subject, whether that be a character or an object, is the most important component of each shot. Begin storyboarding by drawing the subject in each scene or sequence.
You can draw your subjects the old fashioned way with pencil and paper, but most filmmakers utilize storyboarding software like:
- Celtx
- Fade In
- Movie Magic Screenwriter
- Final Draft
Focus on drawing your subject clearly, but don’t worry as much about the background details. You can leave the table in the background simple unless it is the focus of the shot.
If drawing isn’t your strong suit and you want a storyboard that consists of more than just stick figures, consider hiring a professional storyboard artist if you have the budget. A storyboard artist is well-versed in creating detailed drawings for film storyboards and can bring your vision to life.
4) Draw a Background
You’ll need to depict the location where the scene takes place in your storyboard. Add background details behind your subject to help orient people to where the scene is taking place.
Again, this can be as simple or complex as you want it to be. You can add a simple sketch of a window and table in the background to depict a dining room, or you can add detailed layers of an entire city’s skyline. It’s all up to you and what you need the storyboard for.
In close-up scenes, you won’t really need to worry about adding a detailed background since the subject will fill most of the camera shot anyway. But if the subject is far away in a wide shot, you’ll want to add a bit more detail to the environment.
Take this storyboard for the film “The Sound of Music” as an example. You’ll see that the artist included background details to help orient the viewer to where the action is taking place.

Image source: https://boords.com/storyboard-examples
5) Use Arrows to Indicate Motion
Demonstrating movement in static images can prove difficult. That’s where arrows come in.
When you need to indicate where characters are going, (ie- Are they walking down the street? Approaching the camera? Jumping on a trampoline?), use arrows to depict the motion. Movement is the heart and soul of film— movies are called motion pictures for a reason! Incorporating movement is what transforms something from a static photo to a piece of film.
So, you want to give a sense of movement on your storyboard as much as possible by using arrows. Depending on the storyboarding software or app you use, you may be able to play your storyboard back as a flipbook or slideshow, helping you gain an even further understanding of the movement in the scene.
6) Add Camera Movement and Angles
While you work on your storyboard, you’ll also create a shot list. A shot list goes hand in hand with a storyboard because a shot list helps filmmakers stay organized. When creating a shot list, you’ll number each individual shot and add descriptions of the shot size, lens type, location, and more.
You’ll incorporate some of these same details into your storyboard. Once you’ve decided how the camera will move in each shot and what the shot size and angle are, write that in your storyboard below each individual frame.
Being as prepared as possible before arriving on set to start shooting will help the process go smoothly. And deciding on shot sizes and angles beforehand helps eliminate disagreements on set!
7) Include Shot Numbers
Keep that shot list handy! Be sure to label every single shot with its according number to help keep things organized. Shot #1 on your storyboard should match up with shot #1 on your shot list, and so on and so forth.
Numbering each shot makes it easy for the director and crew members to reference specific shots with ease. Crew members can then refer to the storyboard and shot list to gather essential details, such as:
- Location
- Actors in the shot
- Shot size
- Camera angle
- Lens type
- Movement
- Dialogue
Storyboarding software will often automatically number your frames, which is very helpful. But if you’re only storyboarding specific scenes or moments, be sure that the numbers align with your shot list.
8) Repeat, Then Repeat Again!
We’ve covered all the basics for creating a storyboard! Once you’ve made your first one, you’ll go back and repeat the steps over again for additional scenes.
Remember, it might not be necessary to storyboard every single scene in your film. But you might want to do it for key moments or more technically complicated scenes.
It’s also important to note that storyboards don’t have to be set in stone. Feel free to add, subtract, and edit anything you’ve created to come up with a product that best serves your film.

9) Organize and Share With the Crew
When you’re feeling good about your final product, it’s time to share your storyboards with your crew. If you’re using storyboarding software, you likely can share your project with crew members via the cloud. But if you’re working the old-fashioned way with pencil and paper, you’ll need to set aside time to make photocopies and distribute them accordingly.
Crew members who should get access to your storyboards include, but aren’t limited to:
- The cinematographer
- The set designer
- The gaffer (lighting person)
- The costume designer
- Assistant directors
- Producers and clients
When working with software, you can grant different permissions to different crew members. For example, you may grant commenting access to producers and full editing access to your cinematographer and assistant directors.
Feeling Intimidated? We Can Help!
Storyboarding is an excellent communication and organizational tool in the pre-production process of filmmaking. Even though the process doesn’t have to be stressful or overwhelming, it can often feel that way for new filmmakers.
When you want collaborative help with storyboarding, or any other aspect of the film production process, rely on your friends at Stringline Pictures. Our team of film producers has decades of experience creating excellent storyboards and showstopping final products.
Contact us today to tell us about the project you have in mind!

